Up to this point . . .
This is the third part in a series focused on getting familiar with Git for Windows developers. The series assumes little or no experience using the command line. If you missed the first few posts, here is what we have covered so far:
- Installing and configuring Git on your Windows machine
- Navigating directories (folders) from the Bash command line
- Examined a reference containing commonly-used (but basic) Git and Bash commands
In the previous post, we learned how to navigate directories within the Windows file system, create new directories, and delete directories. Now let’s look at creating files, and performing rudimentary (VERY rudimentary) text editing from the Bash command prompt.
Before We Proceed . . .
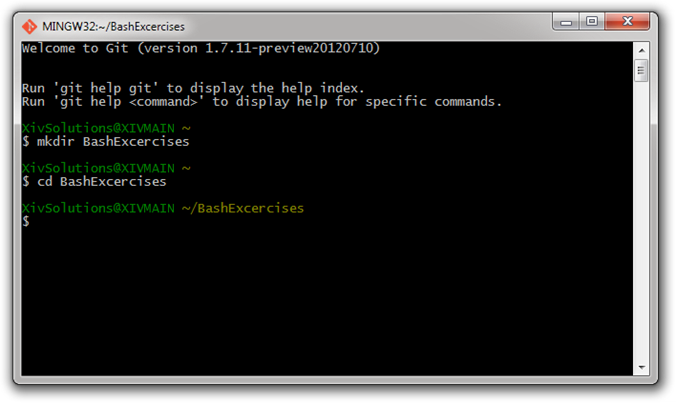
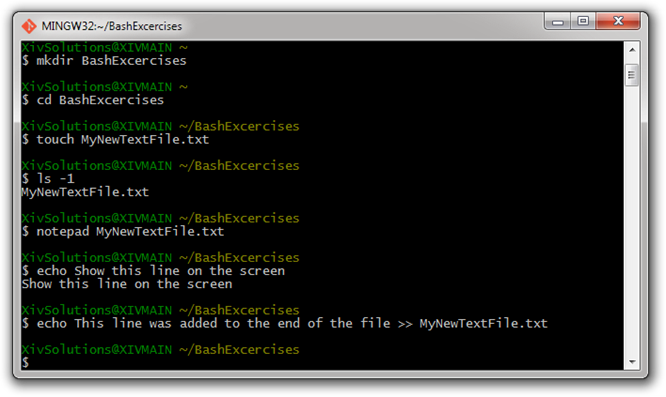
Let’s create a directory to use for the following examples. Open your Bash Command Line Interface (CLI) and make sure you are in your default Windows user folder. Create a new directory within your user folder called BashExcercises, and then move into that directory (Review the previous post if you are unsure how to do this):
Create a Directory for the Following Exercises
Also remember, when we are explaining syntax, we will often use square brackets to denote optional items, and angle brackets to denote use-provided content. In the following:
mkdir [options] <FileName>
We do not type the square brackets or angle brackets. The [options] are, well, optional, meaning there may be none or there may be many, and the <Filename> is required and provided by the user.
Bash: Create/Edit Files (touch/echo)
There are a couple of ways to create a new file using the Bash command prompt. The most basic is the touch command. The purpose of the touch command is ostensibly to change/modify the date/time stamps of files. However, it is commonly used to create new files as well, since, when used without any optional arguments, it does just that: creates a new file, with a date stamp.
Using the Touch Command to Create a New Text File
The syntax for the touch command is
Create a new file with a date stamp:
touch [options] <filename>
There are a number of options for use with the touch command, but for now, we are going to focus on simple file creation, and we won’t be using any of the options. If we want to create a simple text file, we can type:
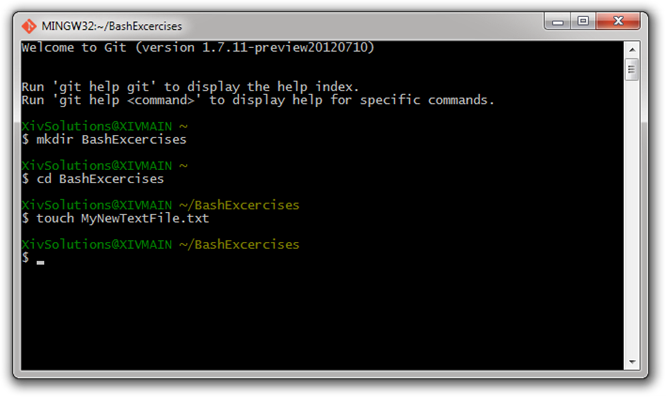
Create a new Text File Named MyNewTextFile:
$ touch MyNewTextFile.txt
Type the above into your Bash window and hit enter:
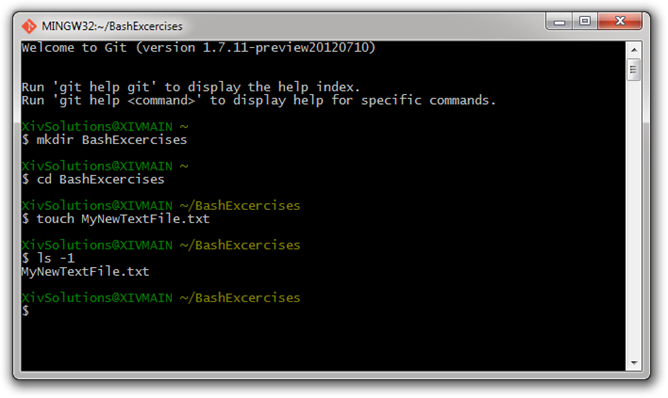
Remember from the previous post that in many cases, when a Bash command executes successfully, we are rewarded with simply a new command prompt. However, we can use the ls command we learned from the last post to examine the contents of our directory:
What do you know? There is is. Now, you could open the new file using Notepad (or the text editor of your choosing), but you won’t see much. We have created an empty text file. To open the file using Notepad from the Bash prompt, simply type:
Open MyNewTextFile.txt in Notepad using Bash:
$ notepad MyNewTextFile.txt
Or, of course, you could open the file the old-fashioned way – by double clicking on it with your mouse!
Using the echo Command to Write Strings as Output
Before we look at using echo to create a new file, we should understand a little about what echo DOES.
The primary design purpose of echo is apparently to write strings to the standard output (usually, the Bash CLI).
The syntax for echo is:
Echo Command Syntax:
$ echo [options] <string>
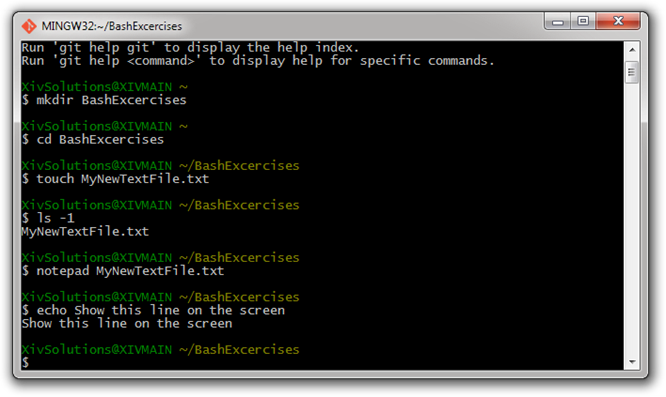
Lets try that now. Type the following into Bash:
Output a line of Text to the Bash Screen:
$ echo show this line on the screen
We can also tell the echo command to write a line of text to a file, using the following syntax:
Syntax: Append text to the end of a file:
$ echo [options] <Text string> >> <FileName>
By using the >> (double right-hand angle-brackets) operator, we tell Bash to append the text to the end of the file. Type the following into the Bash window and hit enter:
$ echo This line was added to the end of the file >> MyNewTextFile.txt
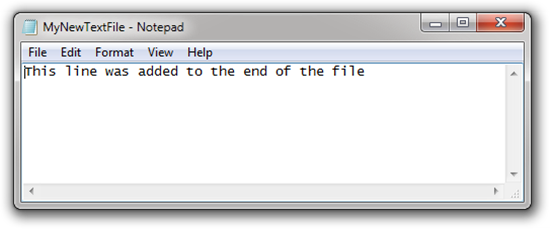
Now, if we use our $ notepad MyNewTextFile.txt Command, we see the following:
Close that window, and let’s add another line. Type the following and hit enter:
Adding Another Line of Text:
$ echo This is another line of text >> MyNewTextFile.txt
Then use $ notepad MyNewTextFile.txt again:
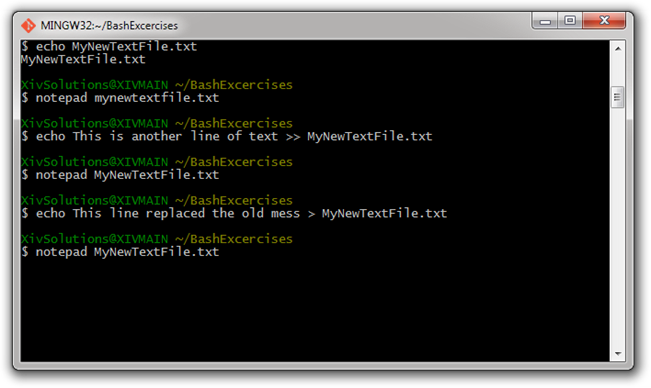
Huh. Looks like it worked, kind of. Apparently, Bash isn’t kidding about appending the new text to the end of the file. Happily, we can use the > (a single right-hand angle bracket) operator to replace the text in the current file and get rid of that mess. Type this and hit enter. Then open the file in Notepad again:
Replace the Text in a File with a New Text String:
$ echo This line replaced the old mess > MyNewTextFile.txt
Your Bash window should look like THIS:
And you should see this in your Notepad window:
Use the Echo Command to Create a New File with Text Content:
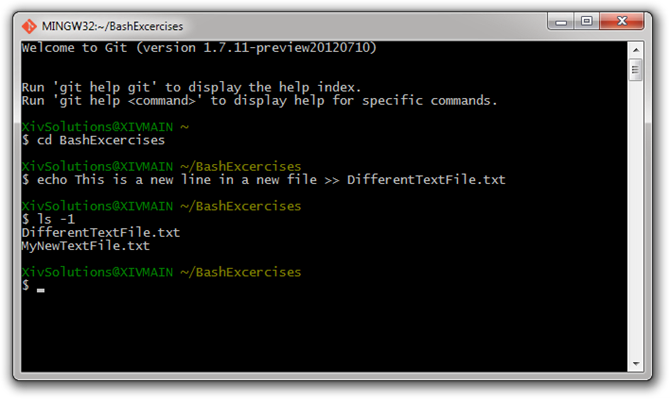
Ok, back to the original subject – creating a new text file. We can use echo to create a new file, and include the specified text string as content. In fact, it works the same as when we appended or replaced the text in an existing file, because, lacking an option argument telling it not to, Bash will assume that if the file specified in our echo command does not exist, that we want to create one. Type the following and hit enter:
$ echo This is a new line in a new file >> DifferentTextFile.txt
Then use ls -1 to display the directory contents. This is what your Bash window should look like:
Note the presence of our new file. Let’s open it in Notepad, and see what there is to see:
Well, well well. Whadd’ya know!
Bash: Remove Files (rm)
Ok, now lets get rid of our first file. To remove (delete) files using Bash, we use the rm command. The syntax for removing files is as follows;
rm [options] <FileName>
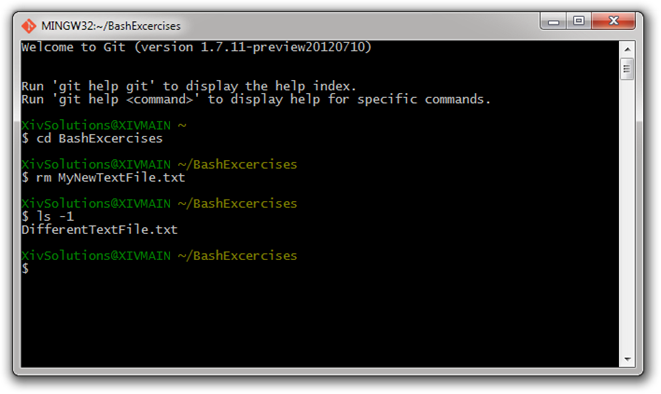
SO now, let’s delete that first file, MyNewTextFile.txt. Type the following, hit enter, then use the ls -1 command to display the directory contents:
rm MyNewTextFile.txt
Your Bash window should look like this:
Remove a Directory and all Contents (rm -rf)
In the previous post, we discussed how to remove an empty directory. But what if we want to remove a direcory and all of its contents? We use the rm command with the -r and -f options:
Syntax for Removing a Directory and All of its Contents:
rm -rf <FolderName>
So now we are going to remove the BashExcercises directory we created at the beginning of this post. Of course, we can’t remove a directory if we are currently IN that directory. So first, let’s return to the directory above (in this case, our home folder) using the cd .. Comand (the cd Command, followed by a single space, followed by two periods in a row. This one means “move up one level”).
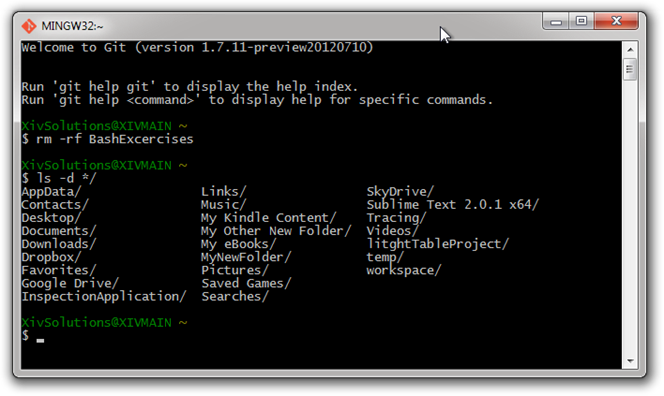
Next, type the following into your Bash window, hit enter, and then use the ls -d */ command to view the directories within the current directory (which should be, at this point, your Windows User folder):
$ rm -rf BashExcercises
When you are done, your Bash window should resemble this (note that the directories are organized alphabetically in columns, and the BashExcercises directory is no longer there. Also note that for obvious reasons, your user folder will contain different folders than mine!).
Now, let’s use everything we just learned in this post, plus we’ll add one final tidbit at the end which you may find useful. We’re going to step through this right quick. We will:
- Add one more new directory
- Add a file containing a line of text to the new directory
- Remove the directory and its contents
- Have Bash tell us what was removed.
1. Add a New Directory Named OneLastFolder to our current directory:
$ mkdir OneLastFolder
2. Add a New File Named OneLastFile.txt, containing the text “One more text line” to the new folder:
$ echo One more text line >> OneLastFolder/OneMoreFile.txt
Notice in the above, I did not navigate into the new folder to create the new file, but simply used the relative path from my current location.
3. Remove the directory and all its contents, and have Bash tell us what was done:
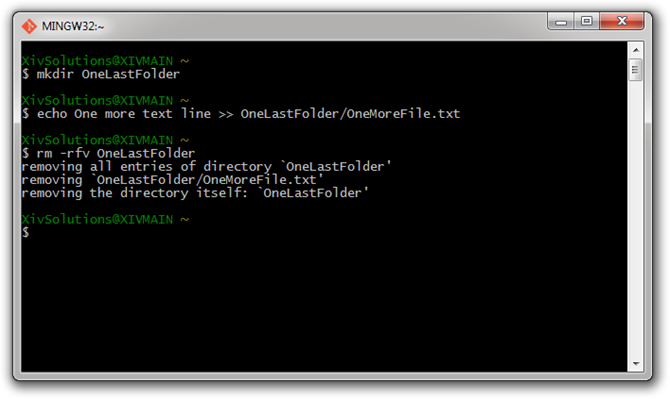
rm -rfv OneLastFolder
Notice in the above, I added one more optional argument, the -v option (for “verbose”). This tells Bash to print the actions it took to the output window.
When you have done all of that, your window should look like this:
There you have it. You now have the most basic set of tools for using the Bash Command Line Interface. From here, we are ready to examine the basic command line operations required to start using Git to manage our code. We’ll pick that up in the next post in this series.
Additional Resources:
- Part I in this series – Set up and configure Git on your Windows Machine
- Part II in this series – Basic file system navigation using Bash
- Basic Git and Bash Command Line Reference
- An A-Z Index of the Bash command line for Linux
- Git Reference
- The Pro Git Book by Scott Chacon (eBook)
- Pro Git (Expert’s Voice in Software Development)
- Git Cheat Sheet
- Github
- Help on Github



Comments
 Vivek
Vivek
AuthorAre there any more posts coming in ?